Airbrush-Painting the Bandai Millennium Falcon 1/144
A bit more than a month after my hiatus from this kit, my paints and airbrush kit finally arrived.
For paints, I bought a couple of lacquer-based primers and top coats and water-based acrylics from Armored Komodo since they were well-priced and highly recommended by a friend. Spoiler alert: I don't have a lot of experience with other paint brands, but I like these so far.
As for the airbrush kit: I bought a cheap KKmoon airbrush and compressor set. I'm able to use it, but let's just say that it's trash. Airflow is inconsistent, so I'm not sure if there's a leak at the nozzle or somewhere else. I made it work for this build, but I really don't recommend learning to airbrush with a cheap kit like this. Fortunately, a smooth paintjob isn't that important for this weathered build. But I'm not confident about using this for a future Gunpla project or similar.
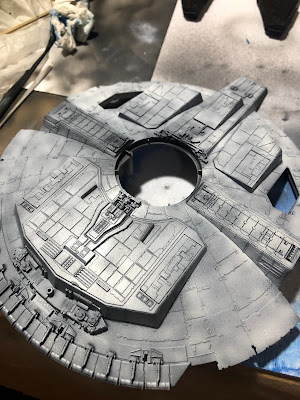
When the primer had dried, I wanted to test how my white paint would look, so I tried it on some of the smaller parts first. The white sprayed on really wet. I think it was a combination of me not shaking bottle of the water-based acrylic enough and pulling back on the trigger too much. I worked it out and learned that acrylics are more finicky than lacquers. But hey, that must be the price for being less cancerous.

Prior to this, I had never done any pre-shading, but thought I understood the concept. So to save myself the trouble of tracing along every line later on, I thought to just concentrate the white base coat on the panels themselves while minimizing the spray on recessed areas to preserve the darker undercoat. I guess it worked out, but I'm not sure if I really saved time or effort.
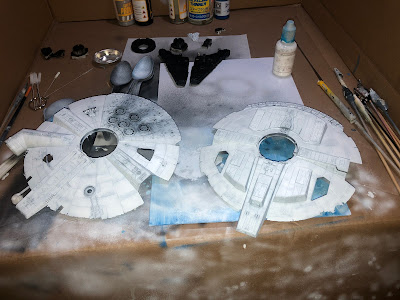
I would go on to post-shade some of the maintenance holes and engine exhaust streaks.
I went too dark with the post-shading, especially the streaks, so I had to soften up those areas with another thin coat of white.
Ignore the apples
After a day or two of cure time, it was time for the gloss coat. I was a bit concerned about this stage because I wasn't sure if my lacquer-based topcoat would eat into my acrylic base coat. But after some testing on plastic spoons, I was confident enough to go for it. You'll read a lot of conflicting advice out there, but I can confirm that using a lacquer topcoat on acrylic is fine IF the acrylic paint is fully cured. I read that the acrylic pigment itself is inert, and should therefore not react to lacquer if the base coat is completely dry.
So with the gloss coat on, it was time for water slide decals.


Comments
Post a Comment