Posts

Showing posts with the label Build log

SD BB MSN-04 Sazabi Building and Painting

Image
I know it's been a while. But let's pretend like the most recent post was just yesterday. Assembly I had been meaning to try painting a candy finish for a while already, and what better kit do that on than the Sazabi. But because I didn't want to mess up my RG just yet, I thought to practice on the SD version first. This SD kit was surprisingly detailed, and even came in two shades of red. But as with most SDs, this had seamlines on the head, knees/shins, and the rifle that needed to be removed. Not too bad, actually. I modified the head to make the face plate removable. Same with the gray parts on the knees. I just didn't take a lot of photos of the process, unfortunately. Oh, and I also used a half-round pearl piece for the monoeye intead of a sticker. Painting For painting, I started with the effect parts. This was my first time trying out fluorescent paints and trying to paint a gradient. I was pretty happy with the results, but the yellow-to-neon green gradient tha

SD NZ-999 Neo Zeong - Building and Painting

Image
Today's build log is about the Yolly SD Neo Zeong, which is pretty much a straight-up recast of the Bandai original. I'd rather not get into the ethics of knock-offs, but I just wanted a cheap kit that I could practice on without caring too much about mistakes. Straight off the bat, let me say that if you want a representation of the Neo Zeong, please buy the original because Yolly's mold is pretty bad, especially the SD Sinanju packed in with the kit. But if your intention is to use just the Neo Zeong parts to make some kind of custom armor for another SD or Nendoroid or the like, this kit will be a cheap way to do so. SD EX-Standard in the Neo Zeong Kit Quality The quality on this kit was just not there. Huge mold lines, poor fit, rough surfaces, shallow details, weird scratches, and loose joints. Stay away from this unless you can overlook all these problems or if you're willing to fix them. I wanted a practice kit, and that's exactly what I got and more. Major

Modifying and Painting the HGUC (#40) MS-06 Zaku II

Image
I bought this kit on sale a few years ago for just $9 with the intention of using it as cheap practice. I had built it and sanded and welded the seams (not very well), but I couldn't find the right green colors in spray cans, so this project got shelved (literally) for some time. Now that I had a respectable painting setup and some new tools, I thought that this kit might finally serve as a warmup before tackling more recent and expensive kits. My plan was to improve the monoeye and maybe add some more surface detail. So after disassembling the parts, I started with modifying the head. I couldn't stand how ugly the monoeye was, so I thought to try to make it look more like the MG 2.0 or RG. I found a curved piece of clear plastic that I measured and cut to fit in front of the monoeye. This clear plastic was soaked in Pledge to make it shinier. Next, I replaced the crappy monoeye sticker with a 4mm pink rhinestone. But because of the new protrusion, it wouldn't fit behind th

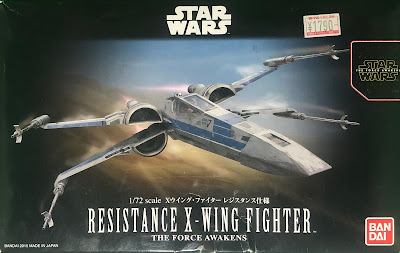
Building and Painting the Bandai 1/72 T-70 Resistance X-Wing Fighter

Image
I used to be a big Star Wars fan. I had watched the movies, kept up with the expanded universe, and played the games. Some of my favorite games were those in the X-Wing vs. Tie Fighter series because of how you could experience and geek out on the fictional technical aspects of various ships in the Star Wars universe. And because of those games, I grew more attached to designs like the Tie Interceptor and of course, the X-Wing. I'll digress a bit to mention that what often amuses me is how game designers (and fans like me) seem to give ship and starfighter tech specs more thought than the movie directors or visual-effects guys. Nerds gonna nerd, I guess.

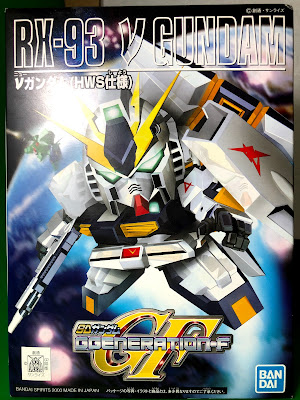
Building the G Generation-F SD BB RX-93 Nu Gundam

Image
Like i mentioned in  a previous post , this pandemic gave me the chance to work on a few kits in my backlog, one of which was this  SD BB (No. 209) G Generation-F RX-93 Nu Gundam . I wanted to warm up with what I thought would be a simple kit before tackling the  Millennium Falcon . I was right about the simple part, but this kit was much more involved than I thought.

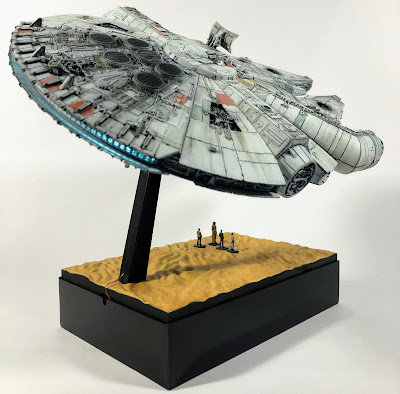
Scratch-Built Base for Bandai Millennium Falcon 1/144

Image
In the continuing tradition of giving myself more work than what I planned for , I had the urge to build a base that would conceal a power bank and a USB toggle switch for the lighting setup of my Millennium Falcon. I had never scratch-built anything with plastic before, but I thought a box would be an easy start. My idea was to make a base that the included sand-dune base could just sit on top of. A base for the base, if you will.

LED Lighting for the Bandai Millennium Falcon 1/144

Image
Before I started with this kit, I didn't really care for lighting it up. And I especially didn't care for the official Bandai lighting unit that sells for half the price of the model kit itself ($20?!). But when I saw how much space there was inside the hull, I couldn't help but take a stab at it.

Detail-Painting the Bandai Millennium Falcon 1/144

Image
Way back when I had just started with the kit , one of the first things I did was to attempt to hand-paint the details inside the turret gun wells using Gundam markers, which were the only paints I had at the time. I didn't care too much about screen accuracy at the start, but I came to regret my color choices as the build went on. Still, I couldn't be bothered to redo it for something that I knew would hardly be seen.

Weathering the Bandai Millennium Falcon 1/144

Image
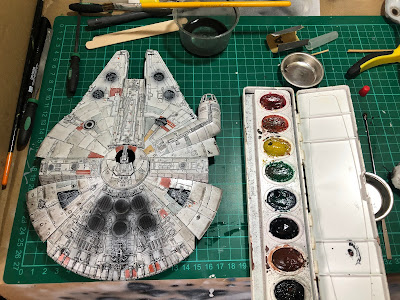
With the decals and gloss topcoat in place, it was time to move on to weathering the kit. My challenge was that, aside from panel-lining and light usage of Tamiya Weathering Master, I had never seriously weathered a model before. For this kit, I researched a bit and saw lots of recommendations to start weathering with an enamel or oil wash. I was hesitant about using an enamel wash because I was still worried about aggravating  some of the cracks from before  even though the model was already protected by layers of lacquer topcoat. And I didn't want to deal with the smell of that much thinner. Oil paint wasn't really in consideration either as I didn't want to buy some new oil paint tubes and turpentine. Instead, I had an idea to make my own wash using my really old (nearly 20 years I think) Prang semi-moist watercolor set. If it turned out bad, I could just wash it off under the tap, I thought. To be on the safe side, I searched around for tutorials or discussions on the u

Water Slide Decals on the Bandai Millennium Falcon 1/144

Image
The Millennium Falcon comes with an assortment of colored panels and markings. And to reflect them on this kit, you can choose between decals and good old-fashioned masking. I definitely wanted to avoid the masking route because of a bad experience in a previous build and because I thought it would be easier to just use the decals. Bandai was generous enough to include both sticker and water slide decals in most of their Star Wars kits. The stickers are actually really good, but I decided to go with the water slides because I think the colors are slightly better. And I actually enjoy the process of applying them.

Airbrush-Painting the Bandai Millennium Falcon 1/144

Image
A bit more than a month after my hiatus from this kit , my paints and airbrush kit finally arrived. For paints, I bought a couple of lacquer-based primers and top coats and water-based acrylics from Armored Komodo since they were well-priced and highly recommended by a friend. Spoiler alert: I don't have a lot of experience with other paint brands, but I like these so far.

Panel-Lining the Bandai Millennium Falcon 1/144

Image
For my first few posts, I'll be backtracking on some builds that I had already completed , most recent of which is the Bandai Millennium Falcon 1/144 The Force Awakens version. My dad insisted that I pick up this kit when we were in Japan in 2016. I had built the 1/72 Resistance X-Wing  the previous year, so I knew the quality to expect. And for 4000 yen, it wasn't a hard choice. And this was before I knew I hated Disney Star Wars. But that's another story altogether.