Building and Painting the Bandai 1/72 T-70 Resistance X-Wing Fighter
I used to be a big Star Wars fan. I had watched the movies, kept up with the expanded universe, and played the games. Some of my favorite games were those in the X-Wing vs. Tie Fighter series because of how you could experience and geek out on the fictional technical aspects of various ships in the Star Wars universe. And because of those games, I grew more attached to designs like the Tie Interceptor and of course, the X-Wing.
I'll digress a bit to mention that what often amuses me is how game designers (and fans like me) seem to give ship and starfighter tech specs more thought than the movie directors or visual-effects guys. Nerds gonna nerd, I guess.
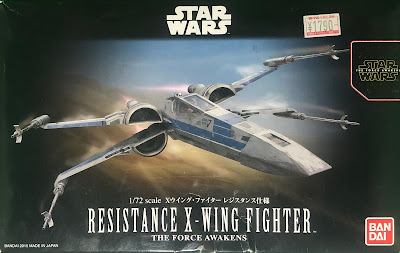
It was 2016 when hype from Star Wars: The Force Awakens was still high. My wife was in Japan at the time (Yes, we love Japan.) so I asked her to pick up a few kits. And when I had heard that Bandai had a new-at-the-time line of Star Wars model kits, I knew I had to give them a try starting with the 1/72 T-70 Resistance X-Wing for just 1790 yen (If you've noticed, I like to mention the yen price because it still amazes me how cheap these kits can be when bought straight from a Japanese retailer). I didn't even notice that the T-70 was different from the Original Trilogy version; I thought it was just a new blue color scheme.
Building and Painting
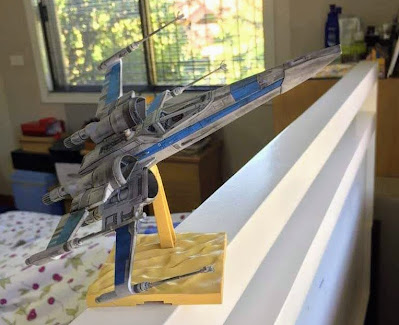
I had actually built and painted this kit a couple of years ago when I wasn't yet into documenting the build. But to go over the process anyway: I didn't have an airbrush yet, and I was going to try a lot of things for the first time. In fact, I think this model was my first attempt at using rattle cans, water slides, Tamiya Panel Line Accent Color, and Tamiya Weathering Master.
I started by priming the white parts with a light gray primer. I thought the Resistance X-Wing was too white so I skipped painting a white base coat. I skipped priming the blue parts too because I didn't have the right blue paint to match the decals. When everything had dried, I assembled the kit.
I can't remember if I used a gloss topcoat first before using the Tamiya panel liner, but considering my inexperience, I probably didn't. There's a few cracks on the plastic to show for it, come to think of it.
Then I applied water slide decals for the first time. I ruined a big one on the wings and had to replace it with the equivalent sticker. You'll probably notice it in the photos. The wrap-around decals were tricky too.
For the weathering stage, I think I still didn't topcoat. I just went straight to brushing on the weathering master. I only sprayed a matte topcoat on the model and the included base after everything was done.
I was quite happy with the results back then. To be fair, I think it still mostly holds up.
Painting the Pilot Figure (Poe Dameron)
As you may know, I recently completed a Millennium Falcon, and that inspired me to revisit this kit. Specifically, I wanted to paint the pilot figure and maybe the base.
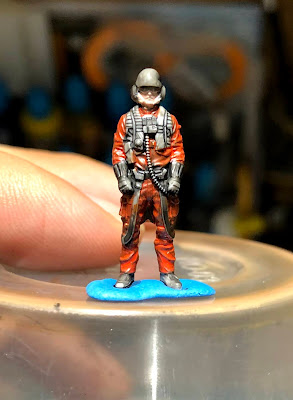
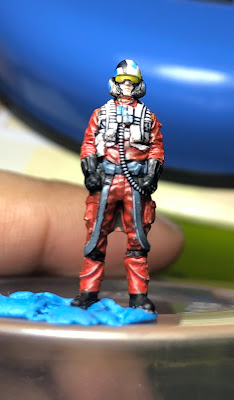
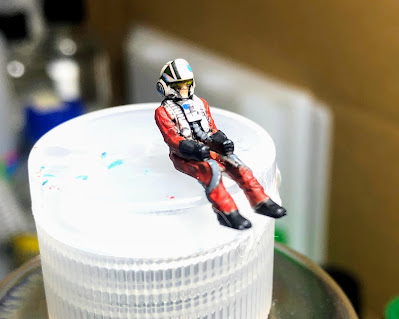
Like I mentioned in a previous post, I practiced on this larger 1/72 pilot figure first before tackling the 1/144 figures in the Millennium Falcon kit. I forgot that the kit came with decals for the helmet so I actually hand-painted the helmet markings too. If I'd redo anything, maybe I'd use gray panel liner on the vest. But overall, not too bad for the first try, I'd say.
With the seated pilot figure, I remembered to apply the water slide decals onto the helmet. Definitely cleaner-looking than my hand-painting. I didn't put as much effort into the legs because they wouldn't be seen anyway.
Final Thoughts
- I recently redid the Jakku desert base on this kit with the same techniques I used on the base for the Millennium Falcon. Specifically, I gave it a brown watercolor wash and I painted matte black on the peg arm and the sides. It went well. But I'd just like to point out that the connection to the base isn't very good. The model droops a bit. Either it's bad connection, or it's loosened from wear. Either way, the base might've benefited from a different peg design.
- I forgot to mention that this kit also comes with a tiny 1/72 BB-8 that you plug into the back of the X-Wing. I only used the stickers on it, but I may attempt to apply the water slides or even hand-paint it in the future.
- Like my Millennium Falcon, this would've probably benefited from some dry brushing and/or paint chipping effects.
- Considering this was essentially a practice kit for me from years ago, I think the final product still turned out to be something I can be proud of. But I guess you can judge for yourself in the full build photo shoot.
- I'm thinking of picking up a 1/72 First Order Tie Fighter to pair with this.


Comments
Post a Comment