Weathering the Bandai Millennium Falcon 1/144
With the decals and gloss topcoat in place, it was time to move on to weathering the kit. My challenge was that, aside from panel-lining and light usage of Tamiya Weathering Master, I had never seriously weathered a model before.
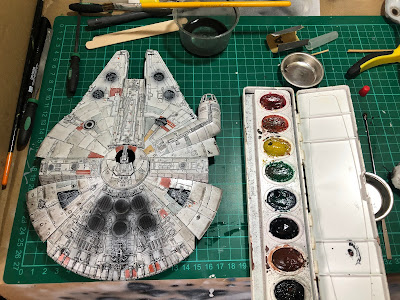
For this kit, I researched a bit and saw lots of recommendations to start weathering with an enamel or oil wash. I was hesitant about using an enamel wash because I was still worried about aggravating some of the cracks from before even though the model was already protected by layers of lacquer topcoat. And I didn't want to deal with the smell of that much thinner. Oil paint wasn't really in consideration either as I didn't want to buy some new oil paint tubes and turpentine. Instead, I had an idea to make my own wash using my really old (nearly 20 years I think) Prang semi-moist watercolor set. If it turned out bad, I could just wash it off under the tap, I thought.
To be on the safe side, I searched around for tutorials or discussions on the use of watercolor washes on models. Surprisingly, the only good information I could find was from a 2005 thread on FineScale.com with a couple of users suggesting to add a drop of soap to the watercolor solution in order to reduce the water's surface tension.
On finally making the wash: I took a small bit of brown and an even smaller bit of black and mixed them in a cup until I had what looked like watery gunk. It took some time and mixing for my old paint to dissolve, but it eventually did. Then I added a drop of liquid dishwashing soap and mixed again. I took a big brush and just brushed the wash across all the surfaces. I was really happy with the results. The soap definitely made it flow like magic.
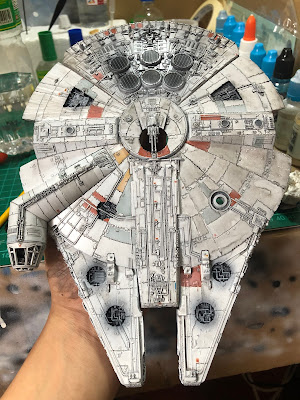
After letting it dry for a few hours, I began cleaning off the excess.
As usual, I was a bit heavy-handed and I ended up cleaning it up too much where I was mostly left with panel lines.
To compensate, I had to add some weathering streaks. This time, I used the Tamiya Panel Line Accent Color to dab beads of enamel around the saucer that I then pulled down with a brush. Still heavy in some areas, but I think I did alright for a first attempt at the technique.
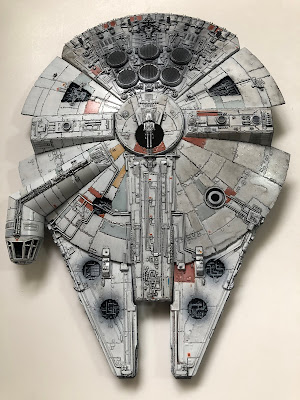
OCD won out in the end when I still added the hull damage even though I thought to just skip those details.
Yes, I know there should be more than three holes
When I was mostly happy with the weathering, I sealed it up with a couple of layers of matte topcoat.
At this point, the kit's exterior was mostly done. I just couldn't completely snap the halves together yet because I wanted to install LEDs inside and I was still waiting for the parts to be delivered.


Comments
Post a Comment